How to Activate Windows Plesk Hosting?
Atak Domain asks you to choose a domain name for your website during the purchase process so you can connect your hosting service with your domain. If you select a domain name at this stage, the connection between your domain and hosting is established automatically.
If you did not choose any domain name during the purchase process, this article will guide you step-by-step on how to activate Windows - Plesk Hosting and how to connect your domain.
To Activate Windows Plesk Hosting:
1- Log in to the Customer Control Panel:
Log in to the Atak Domain customer control panel.

2- Select Your Hosting Account:
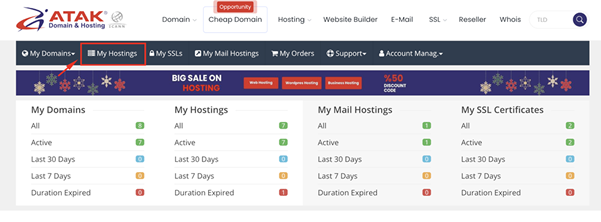
Click the “My Hostings” button in the Atak Domain Customer Control Panel.
-
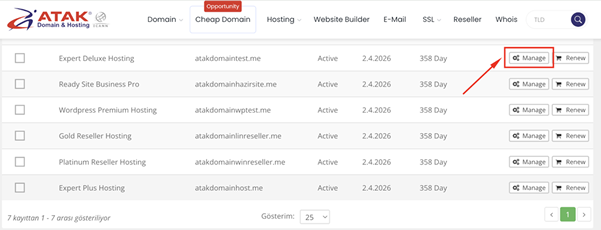
Click the Manage button next to your hosting service.
3- Associate Your Domain Name:
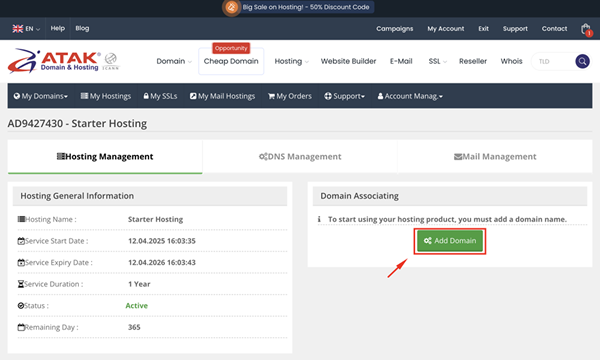
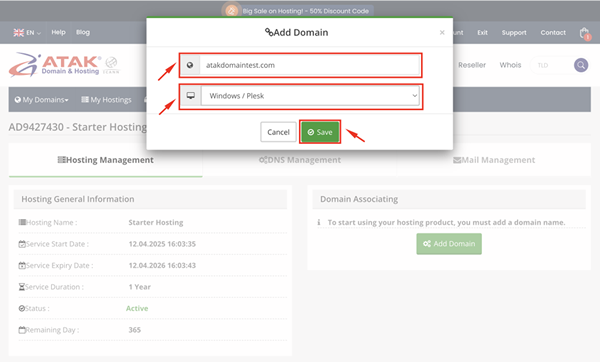
Click the green "Add Domain" button under the message “To start using your hosting product, you need to add a domain name.”
- Enter your domain, select the Windows / Plesk platform, and click the Save button. (You must enter the domain without www)
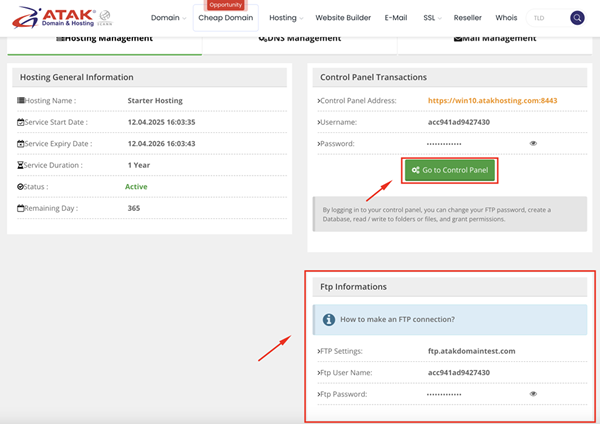
- You have activated your Windows - Plesk panel and successfully connected your domain. Now, you can access the Plesk panel by clicking the "Go to Control Panel" button. Under the FTP Information section, you can find the username and password to connect via FTP.
4- Update Your DNS Records:
Whether your domain is registered with Atak Domain or another provider, you need to connect your domain to your hosting via DNS records.
Option 1: Use Atak Domain's Name Servers
Option 2: Manually Update Your DNS Records
Option 1: Use Atak Domain's Name Servers
The easiest way to connect your domain to Windows Plesk is to point your domain to the following default name servers. In this case, your DNS management will be handled through Atak Domain servers.
Nameserver 1: tr.atakdomain.com
Nameserver 2: eu.atakdomain.com
Note: If your email service is hosted by another provider (such as GoDaddy, Yandex, Google Workspace, etc.), make sure to add the necessary DNS records of the email service from our DNS Management screen.
Option 2: Manually Update Your DNS Records
If you want to continue using your current name servers, follow the steps below carefully:
Step 1: Find Out Your Plesk IP Address
Follow the steps in the link below to find out your server's IP address:
How to Find Your Shared IP Address in Plesk?
Step 2: Point the A Record to the Plesk IP Address
Log in to your DNS provider’s portal and find the DNS settings. Add the following A records for your primary domain (yourdomain.com) and www.
| Host/Name/Alias | Type | Target |
| yourdomain.com | A | (Plesk IP Address) |
| www | CNAME | yourdomain.com |
Save your DNS settings and wait for the records to fully propagate on the internet. This process usually takes 1–4 hours.
Congratulations!
You have activated your Windows - Plesk Hosting and connected your domain.